
All in one solar street lights, are standalone devices that house an LED light, a battery, and a solar panel. Because all the necessary parts are already included in one unit, they are simple to install and require little maintenance. They remove the requirement for more complicated wiring and installation.
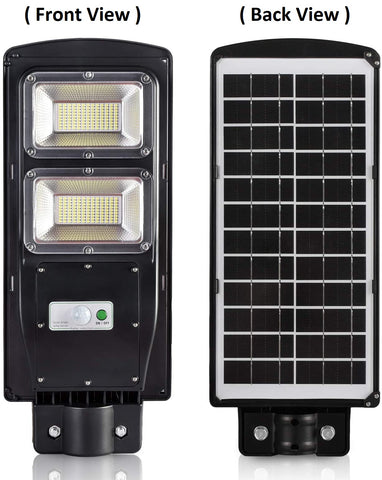
By design, all-in-one solar street lights are weather-resistant. They can tolerate inclement weather, including rain, snow, and extremely hot or cold temperatures, and can, therefore, be used in various settings.

Steps to install Solar Street Light
1. Charging :

Charge the light for at least two days before installing it. That is, turn it on by pressing the On/Off button, charge it during the daytime and switch it off at night. Repeat this for two days so the battery will be calibrated.
2. Find out a Suitable Location:
Choose a location with adequate sunlight exposure throughout the day for the solar panel to charge the battery effectively.
3.Test the System:
Before securing everything:
- Test the system to ensure all components function correctly.
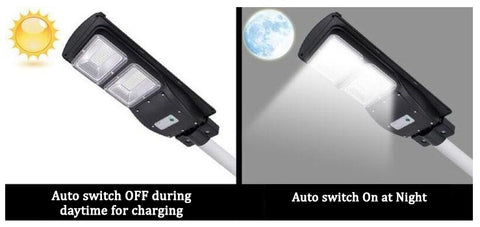
- Cover the solar panel to simulate night-time and observe if the light Turns On & when the solar panel is exposed to sunlight light Turns Off
- Check properly before erecting the pole.
4. Prepare the Pole:
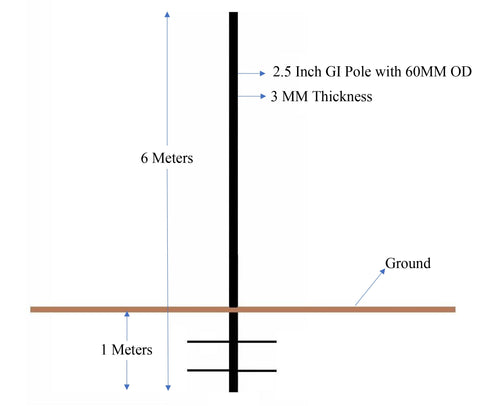
If you're using a pole, ensure it's tall enough to provide adequate lighting coverage and strong enough to support the light fixture. Preferably, it should be a 2.5 inch GI pole with a 60MM OD.
Dig a hole about 3 to 4 feet deep for the pole's foundation. The depth will depend on the pole's height and local regulations. In some cases, you may need to pour concrete for added stability.
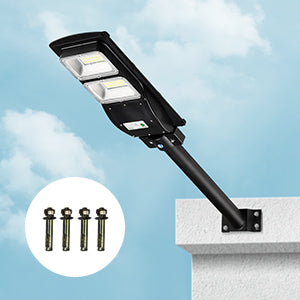
5. Secure the Components:
Once you've confirmed everything is working, securely fasten all components to the pole or mounting surface.
6. Final Checks:
Double-check if the light is working by covering the solar panel to check if light turns on and when sunlight hits the solar panel the light turns off. Tighten any loose bolts or screws, and ensure the light fixture is positioned correctly for optimal lighting coverage.
7. Erect the pole:
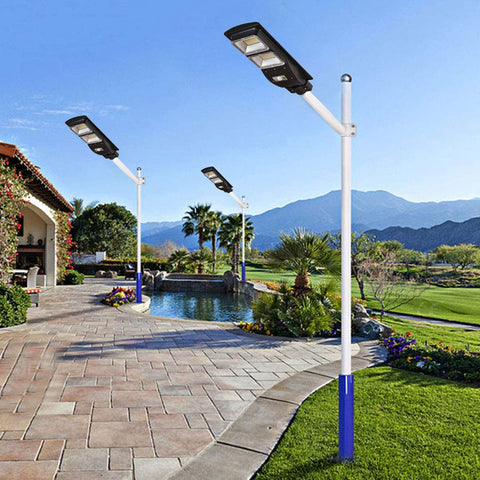
Erect the pole on the dug hole and pour gravel and concrete into it. Place a cross beam to support the pole until the concrete dries.
8. Regular Maintenance:
Periodically check the system for dirt, debris, and any signs of damage. Clean the solar panel and LED fixtures as needed.
After installation, your all-in-one solar street light should be able to Turn On automatically at dusk and Turn Off at dawn. Additionally, it must operate autonomously, adjusting brightness from low to maximum based on your defined schedule profile. When it senses no one is around, the solar street light will automatically dim or lower its intensity to 30% of its full brightness, according to its original factory setting.